Canon vs. Nikon - Automatic modes - How both implement auto and scene modes
We will be taking a look at automatic modes on Canon and Nikon cameras, using the 80D and D7500 as examples from both camps.
Both these cameras have quite an array of automatic modes which help newer user, or even anyone trying to quickly get a good shot without fiddling too many dials and knobs. Being mid-range cameras, both are quite advanced, but not quite to be out of reach of new users like the pro level bodies. Here automatic modes are the key to make the newbies feel home and not get overwhelmed by settings and dials. These settings can also be useful for advanced users who have firm grip over knowledge of how and when to change which setting, so they should be given a look before ruling out.
This article is also a part of the series on the Canon 80D vs. D7500. You can find the other parts here:
Canon vs Nikon - Mid-range battle: 80D vs. D7500 - Introduction and 80D advantages
Canon vs Nikon - Mid-range battle: 80D vs. D7500 - D7500 advantages
Canon vs Nikon - Mid-range battle: 80D vs. D7500 - Fine differences and conclusion
Canon vs Nikon - Mid-range Autofocus System: How both implement viewfinder Autofocus (using 80D vs. D7500's AF systems)
Now let's get started.
Canon vs. Nikon automatic modes
Here using 80D and D7500 as specimen you'll get to know how Canon and Nikon implement their automatic modes and how equivalent functions are implemented and accessed.
Automatic modes - Like most entry level and mid-range cameras, both D7500 and 80D have basic modes on their dials to assist newcomers and greenhorns of photography. These are basically "Point and Shoot" modes which convert these serious photography gears into point & shoot cameras when you just want to get a good shot without much fussing over settings while letting the camera think out what's the best setting for the situation.
- Mode Dial - The D7500 and 80D both have full auto, no flash, scene and effects modes on the mode dial.
- Nikon has isolate its mode advanced PASM modes from the rest modes. the other modes are auto, effects, scene, no flash and custom user modes - U1 and U2.
- The 80D also has creative auto, not featuring in D7500.
- Canon has divided it's mode dial into two zones
- Creative Zone - Consists of full manual and semi automatic modes which include P, Tv, Av, M, B, C1 and C2 and is geared towards those who have the technical knowhow of how exposure triangle, exposure compensation and white balance work.
- Basic Zone - Consists of full auto, no flash, Creative Auto, Scene and effects mode to assist novices who are new to the world of photography in getting a good shot.
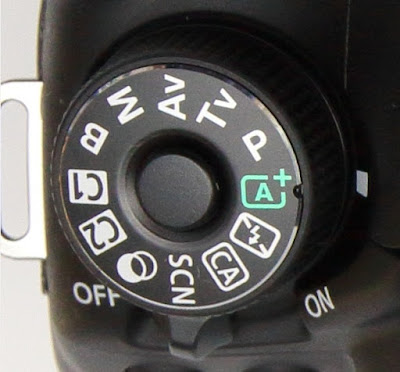 |
The Canon 80D's mode dial - It is divided into two parts - Creative Zone and Basic Zone. Creative zone involves the non automatic and semi automatic modes (P, Tv, Av, M, B, C1 and C2) meant for users who want to have full control over settings and possess the technical knowledge for using them. Basic mode involves automatic modes (A+, Full Auto with no flash, CA, SCN, effects) which assist novice users in getting good images.
Courtesy: Author - MKFI Source - commons.wikimedia.org |
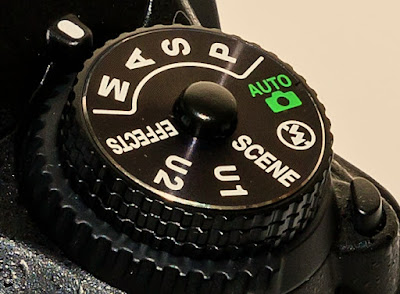 |
D7200's mode dial (same as D7500) - Here we can see the manual and se-automatic M, A, S and P modes clearly being isolated from the rest. There also exist the two User settings U1 & U2. The rest are automatic modes which include full auto, full auto with no flash, SCENE mode and EFFECTS mode.
Courtesy: Author - A.Savin Source - commons.wikimedia.org |
- Creative Auto (80D only) - It is similar to full auto but with some customization and control over settings by allowing control over of flash, ambience selection, depth of field (background blur), drive mode and picture quality. It's basically a semi-auto mode complementing the full auto by giving more control to the user over the "effects" of various settings that can be changed (e.g. change in aperture changes background blur etc.) without going too much into technicalities. It basically creates an abstraction layer that allows users to get a specific photographic effect without having knowledge of how exactly it's achieved.
- It allows the user to set following functions (mode dial to CA and press Q button):
- Ambience based shot - changes exposure and white balance. (Discussed later)
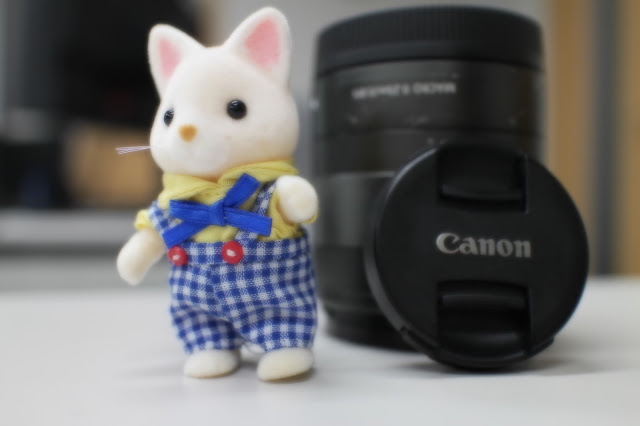
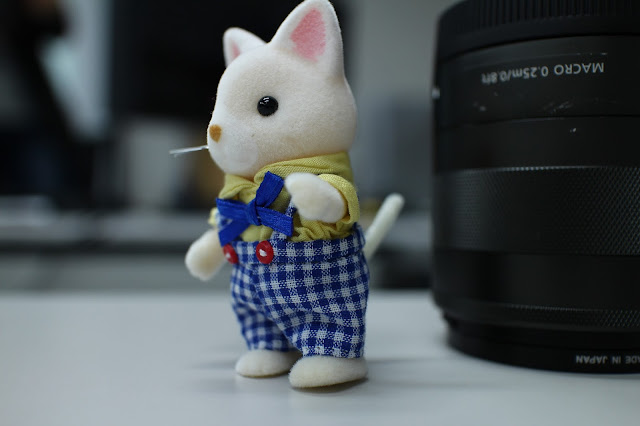
- Background blur - changes aperture. Camera will adjust other exposure settings like shutter speed and ISO to compensate for change in aperture (illustrated below)
- Drive mode - single shot, continuous, timer etc.
- Flash control
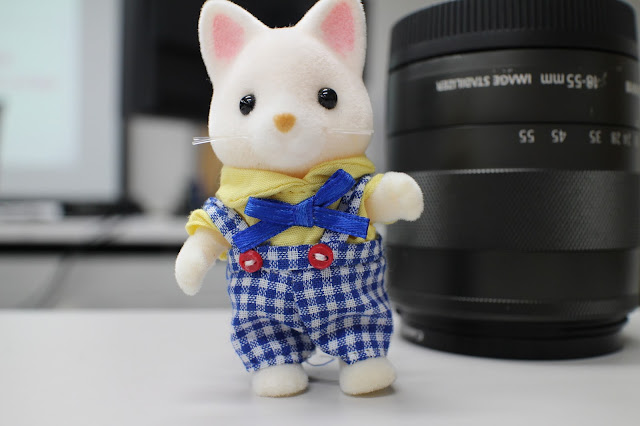 |
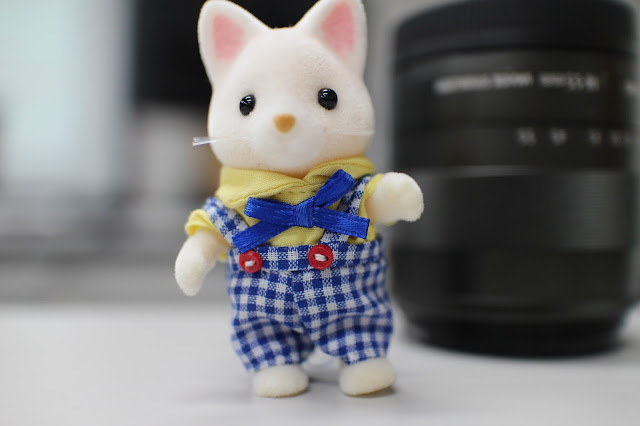
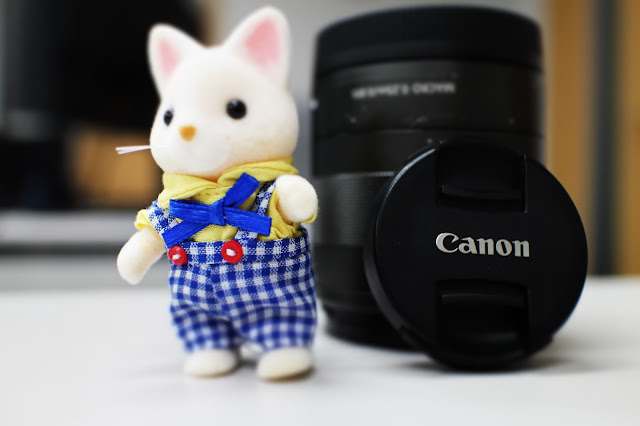
Background Blur - Sharp - The image background looks less blurry and sharp due to the use of a narrower aperture (f/5.6) which is the main setting which is affected when adjusting background blur setting. Notice that due to the use of a narrower aperture, a higher ISO of 400 was required along with a slower shutter speed of 1/30th.
Courtesy: Author - Akinori YAMADA Source - flickr.com |
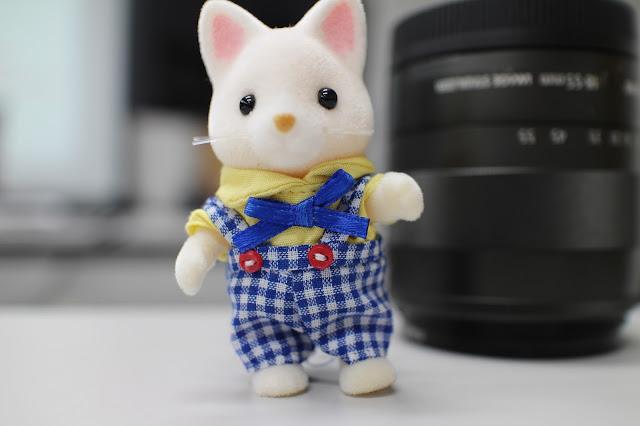 |
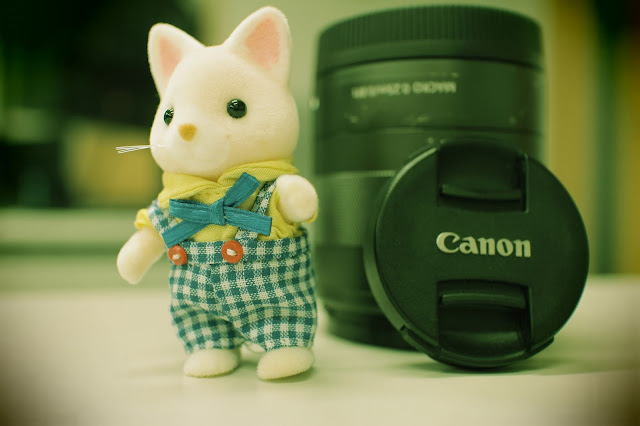
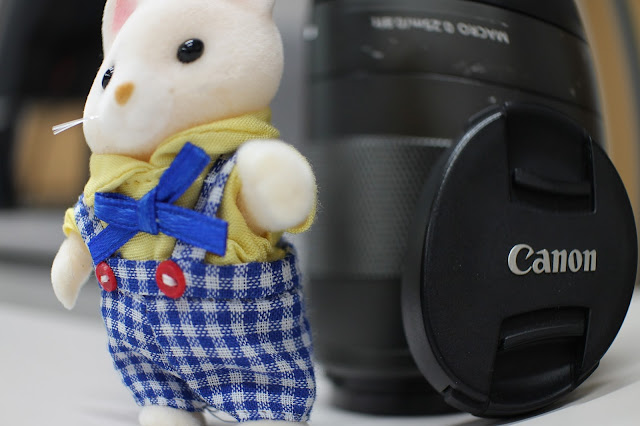
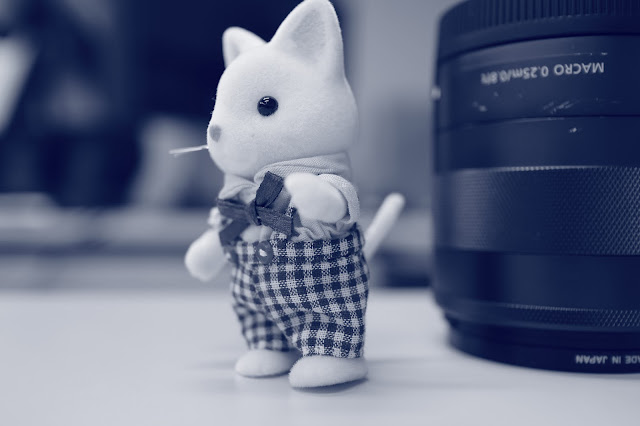
Background Blur - Normal - The image background isn't too out of focus but still less sharp due to the use of a medium aperture (f/2.8). F/2.8 is 2 stops (4 times) brighter than f/5.6, hence the camera got the liberty to use an ISO of 100 which creates least amount of image noise.
Courtesy: Author - Akinori YAMADA Source - flickr.com |
 |
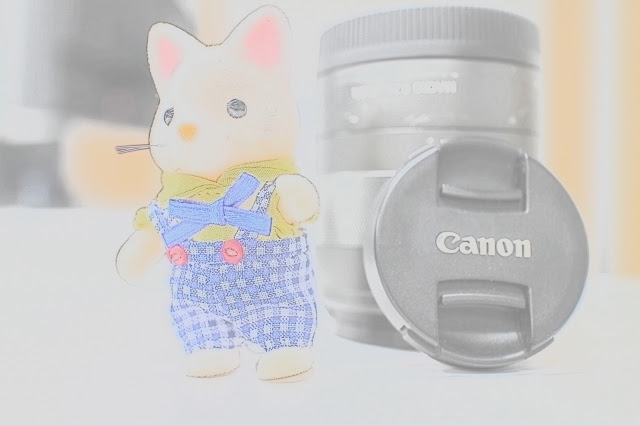
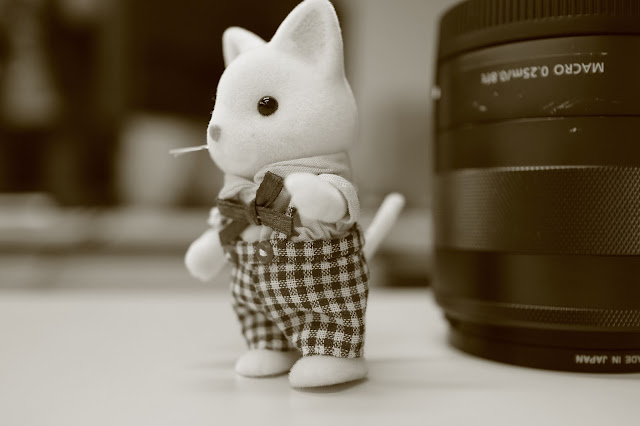
Background Blur - Blurred - The image background is very much out of focus thanks to the use of very wide aperture (f/2.0). Due to such a large aperture which lets in a lot of light, the camera could use (or had to use) a higher shutter speed and an ISO of 100 to avoid over brightening the image.
Courtesy: Author - Akinori YAMADA Source - flickr.com |
- Scene modes - Scene modes are geared towards newcomers to photography to assist them in getting a good result for a given type of photography or situation like say portraits, landscapes or sunsets. They give the user a bit more control and customization than full auto by allowing user to select a mode with best settings preset for a given scene type like sunset, portrait, kids etc. It helps anyone who wants a quick shot without getting too much involved in changing settings and exposure; making it quite a handy tool - Useful for quickly a snapping and sharing on social media platforms.
- D7500 and 80D both have a dedicated slot for scene mode on their mode dials.
- The D7500 has 16 scene modes while the 80D has 10.
- The modes common to both are -
- Portrait - soft natural skin tones, background blurred for subject isolation
- Landscape - smaller aperture for larger depth of field to get most of the scene in focus. Flash is disabled.
- Kids - higher shutter speed for kids moving erratically. Continuous burst recommended.
- Sports - to capture fast moving subjects. Higher shutter speeds to freeze motion and higher ISO to compensate for higher shutter speed, no flash.
- Night Portrait - Combines both flash and ambient light for taking night portraits along with background. Flash fires first to expose the subject portrait while the camera continues exposure for some time for more natural light. Use of tripod recommended.
- Close Up - macro close up shooting of flowers insects etc. Shoot from close range. Use dedicated macro lens.
- Candlelight - for subjects lit in candlelight. Slow shutter speeds, use tripod to avoid camera shakes. Flash disabled.
- Food - vivid bright colors of food items. Not suitable for human skin tones.
- Night Landscape - Slow shutter speed for long exposures at night. Designed to reduce noise and unnatural colors common during night photography.
- Party/Indoor - useful in low light indoors. Flash is used but with slower shutter speed to keep good balance between foreground and background exposure.
- Beach/Snow - used where the scene is naturally extremely bright (e.g. sand, snow) which can fool the camera metering system into underexposing. Flash disabled.
- Sunset - Preserves the deep colors for that quintessential sunset and sunrise.
- Dusk/Dawn - Preserves colors during low light just after sunset or before sunrise.
- Pet Portrait - Used to shoot pets. Similar to Sports but using flash by default (but with no AF assist).
- Blossom - Increased color saturation for blossoms with lower apertures for larger depth of field.
- Autumn colors - Landscapes with deeper saturated colors. Lower aperture to get most objects in scene in focus.
- Handheld night scene - four continuous shots taken and combined into single one with reduced camera shake.
- HDR backlight control - ideal for scenes with large range of tones from dark to bright. Three shots taken with different exposures, then combined in a single one with both dark and bright areas exposed appropriately.
- In the 80D we have additional customization for Color tone available in "food" and "candlelight portrait" scene mode which can be set from warm to cool.
- Effects and Creative filters - Both come with their own set of creative filters too and have a dedicated mode for it on the mode dial.
- While Canon uses an image of intersecting circles to suggest it, Nikon clearly has "EFFECTS" written for the filter mode.
- Filters and Effects common to both are -
- Toy camera* - simulates the effect of a toy camera. Adds color cast and vignetting (darkened corners).
 |
Shot with the Canon EOS M with no creative filters applied. Compare the color cast and vignetting with the one above.
Courtesy: Author - Akinori YAMADA Source - flickr.com |
 |
Toy camera effect (on a Canon SX220 HS) - Notice the color cast and darkening of corners.
Courtesy: Author - garryknight Source - flickr.com |
- Miniature - creates the Diorama effect (miniature faking) by artificially blurring outer segments of the image such that only the desired wide region (which looks like the plane of focus) remains in focus. The resulting effect looks as if the area whose image is taken is very tiny and has been taken from close proximity with a macro lens. Hence the name miniature effect. Both Canon and Nikon allow changing the orientation of the area in focus and it's position while Nikon also allows you to adjust its width giving some extra flexibility.
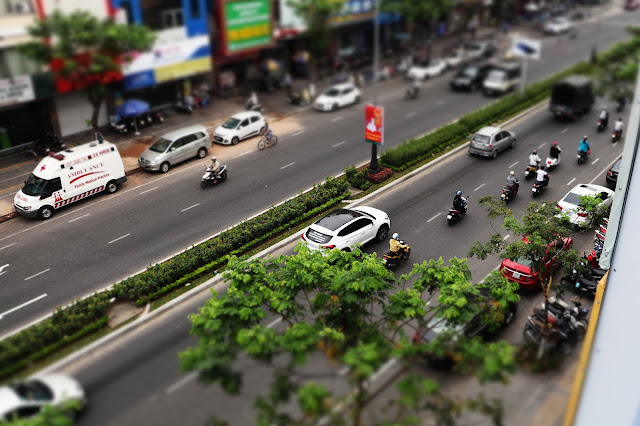 |
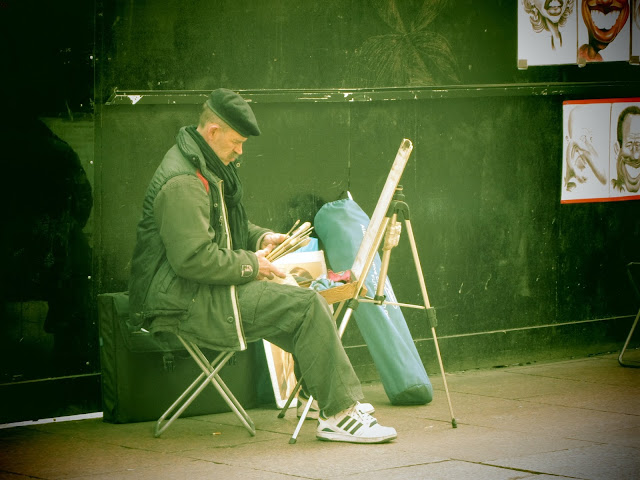
Miniature effect shot on the Canon 80D: The effect works best when used on cityscapes from an aerial vantage point to create a miniature effect of the same.
Courtesy: Author - TranBach Source - flickr.com |
 |
Miniature effect with the Canon EOS M - Notice the gradual blurring of top and bottom halves.
Courtesy: Author - Akinori YAMADA Source - flickr.com |
- Effects exclusive to Nikon -
- Night vision - As the name suggests, this mode is used to take images in very dark conditions. Monochrome image with high noise is produced since it uses extreme ISO values.
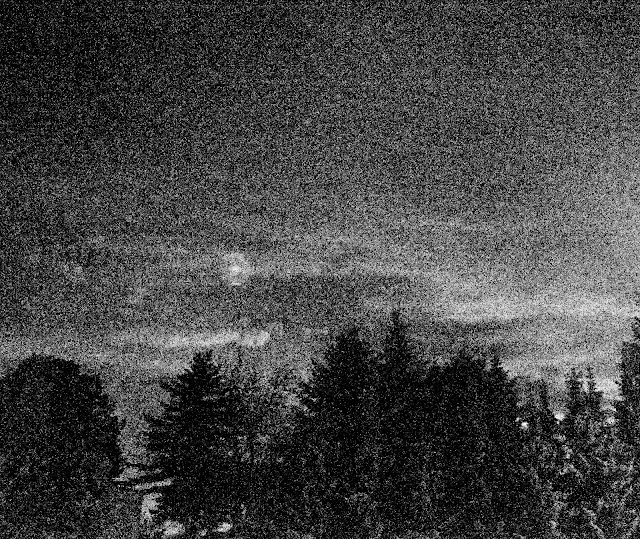 |
Nikon Night vision effect: Used in the Nikon D5100 and 18-55mm f/3.5-5.6 lens at f/4 and 1/30th shutter. The high level of noise is obvious since it uses an extreme ISO of 65535 which makes it get an exposure in extreme darkness.
Courtesy: Author - Daniel Juřena Source - flickr |
- Super vivid - Image looks more vibrant with increased saturation and contrast.
- Pop - Saturation is increased.
- Selective color - Creates a black and white image with only selected parts in color. Can select up to three colors with adjustable hue range (color tolerance range) for each.
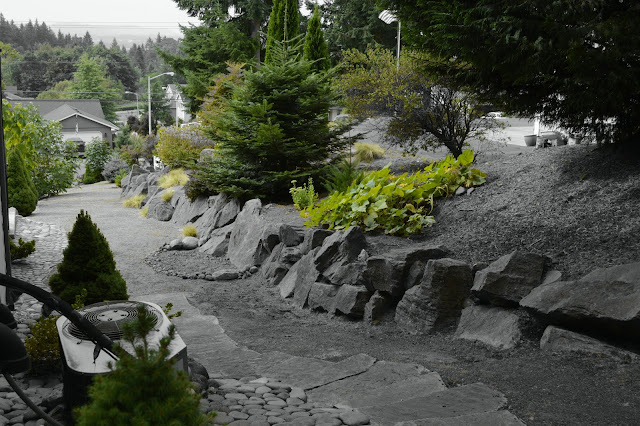 |
Selective color using the Nikon D5200 - Here we see green being selected, while every other color is muted.
Courtesy: Author - swong95765 Source - flickr |
- Silhouette - Creates silhouettes with darkened subject on a bright background like a person or animal in front of a bright sky, sunset etc.
- High key - creates bright scenes often overexposed.
- Low key - creates underexposed dark scenes.
- Photo illustration - Sharpened outlines with simplified and vibrant colors, almost like a low bit color image to get the effect of an illustration in cartoon comic book.
- Effects exclusive to canon -
- Grainy B/W* - High contrast black and white image with high grain added for that vintage effect. Note that unlike the Nikon "Night Vision" effect where the noise is as a side effect of pumped up ISO, here the noise is synthetically added and isn't a function of the ISO.
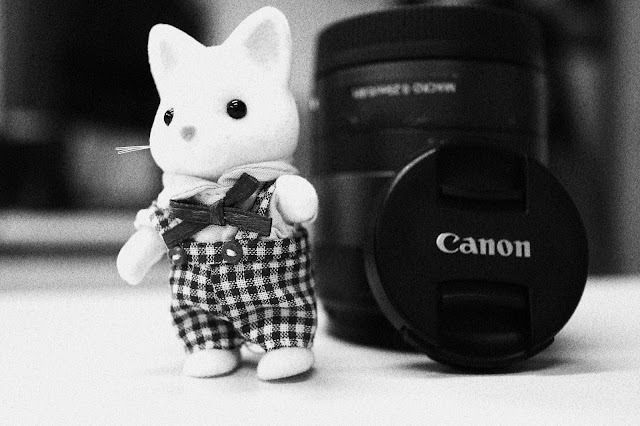 |
Grainy black and white effect with the Canon EOS M: Notice the high contrast along with the grain giving it a look of an old newspaper. Shot at f/2.8 with 1/30th shutter at 22mm and with ISO only 100, which suggests that ISO is not playing a role in the noise.
Courtesy: Author - Akinori YAMADA Source - flickr.com |
- Soft focus* - Adds some soft blur and glow to image to simulate a soft focus lens. Works well for portraits for that dreamy effect.
 |
Soft focus effect with the Canon EOS M: Notice the added glow and blur in the image as compared to the one with no effect.
Courtesy: Author - Akinori YAMADA Source - flickr.com |
- Fish eye* - Simulates the extreme barrel distortion of a fish eye lens.
 |
Fish eye effect using the Canon EOS M: Used to simulate the extreme barrel distortion of fish eye lens. Image area towards the edges and corners is lost and final image may show some loss of detail as the image is zoomed in in the central area.
Courtesy: Author - Akinori YAMADA Source - flickr.com |
- Water painting* - Similar to Nikon's photo illustration where outlines are highlighted except that colors look whitish and washed out.
 |
Water painting effect in Canon EOS M. The overall image is brightened with lowered contrast and emphasized edges.
Courtesy: Author - Akinori YAMADA Source - flickr.com |
- HDR art (standard, vivid, bold, embossed)
* Effect can be adjusted in Canon 80D, e.g. as shown below the color cast can be adjusted by changing the tone. (Images are from Canon SX220 HS with toy camera effect with various tonal adjustments, but should be similar to the 80D)
- Basic mode adjustment (Canon only) - Canon in its cameras allow adjustment of the following functions in Basic Zone:
- Drive mode
- Flash
- Background blur
- Ambience Selection
- Lighting/Scene type selection
- "Full Auto" and "No Flash" modes allow adjusting only the flash and drive modes, but not the background blur, ambience and "Lighting/Scene type".
- "Creative Auto" allows four of the above functions - flash, drive, ambience setting and background blur but not "Lighting/Scene type".
- "Scene Mode" also allows adjusting four of the above functions - flash, drive, ambience setting and "Lighting/Scene type" but not the background blur.
- Ambience Selection - This adjustment uses specific exposure compensation and white balance values to create presets that are suitable for a particular ambience. Options available:
- Standard (No ambiance setting added)
- Vivid - Subject looks sharp and vivid
- Soft - Softer subjects, good for portraits
- Intense - reduces overall brightness, but improves contrast and saturation.
 |
Ambience - Intense: Slightly darker than original and more contrast with emphasis on subject.
Courtesy: Author - Akinori YAMADA Source - flickr.com |
- Cool - adds cool bluish color cast
 |
Ambience - Cool: Slightly darker than original and more contrast with emphasis on subject.
Courtesy: Author - Akinori YAMADA Source - flickr.com |
- Warm - Softer subject with warm colors
- Brighter - overexposure added. Amount of overexposure can adjusted by selecting low/medium/high setting.
- Darker - underexposure added. Amount of underexposure can be adjusted by selecting low/medium/high setting.
- Monochrome - Single color image (see below)
- Note - All settings have 3 level effect adjustment of Low/Standard/High, except for Brighter, Darker which have (low/medium/high) and Monochrome (Blue/Black & White/Sepia).
- Note - Ambience selection is available as an adjustable option for Creative Auto (Ambience based shots) and Scene mode (except "HDR backlight control"). Note: for scene modes "food" and "candlelight portrait" only Brighter, Darker and monochrome settings are available.
 |
Ambience - Monochrome blue: This Ambience type simulates the monochrome effect resulting from the cyanotype process for development of film.
Courtesy: Author - Akinori YAMADA Source - flickr.com |
 |
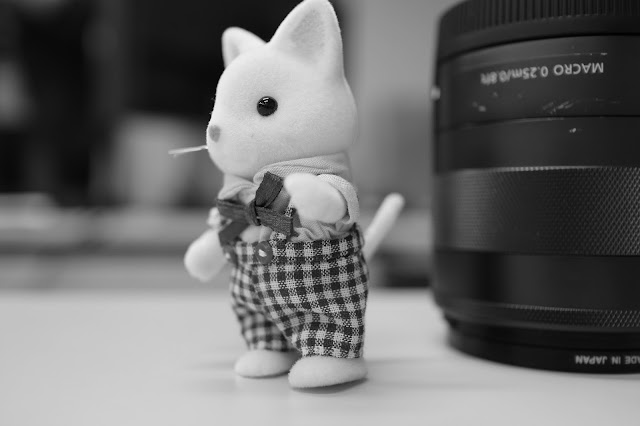
Ambience - Monochrome - Sepia: Simulates the effect of ageing in film photographs.
Courtesy: Author - Akinori YAMADA Source - flickr.com |
 |
Ambience - Monochrome - black and White: Standard black and white monochromes
Courtesy: Author - Akinori YAMADA Source - flickr.com |
- Lighting/Scene type selection - This selection basically provides a list of white balance presets in a layman's language.
- This selection is available with only Scene modes and that too for only 5 of its scene modes: kids, portrait, landscape and macro (close up) and sports.
- Available options include :
- Default - Settings suited for most subjects
- Daylight - Ideal for outdoors and subjects under sunlight.
- Shade - Shooting subjects in shade
- Cloudy - Overcast conditions affect how colors are rendered in daylight
- Tungsten light - Use when shooting under tungsten light, reduces yellow color cast caused by tungsten light.
- Fluorescent light - Use when fluorescent lighting is used from tubes and CFL.
- Sunset - Ideal for capturing those warm sunsets.
- Note: Tungsten and Fluorescent light aren't available for "Landscape" scene mode.
Conclusion - With some extra modes like creative auto and extensive set of settings to assist the new user, Canon seems to have a lead in terms of automatic modes. It has a unique "Creative Auto" mode and settings like "Lighting/Scene type selection" abstracts complex white balance settings using a simple scene based interface, while ambience setting gives similar customization based on surrounding mood. On the other hand background setting hides the complexities of changing apertures. Many of the scene and filters are customizable giving some creative liberties to the novice user.
On the other hand Nikon tries to compensate for this by providing some very extensive set of Scene modes not found usually in the competition, while effects like night vision and selective color are quite useful.
Thanks for reading. If you like this article then please share it.
Your comments are most welcome.
You can also help me by using the link provided on my site.


Comments
Post a Comment